How do I use the Sketch to Controller Design Board template?
Edit the prompt in the box under the preview — the template's model and format are already selected — and press Generate. Your version appears right on this page.
Generates a polished industrial design presentation from a rough game controller doodle, useful for product concept visualization.

This template uses your photo — add one with the + button.
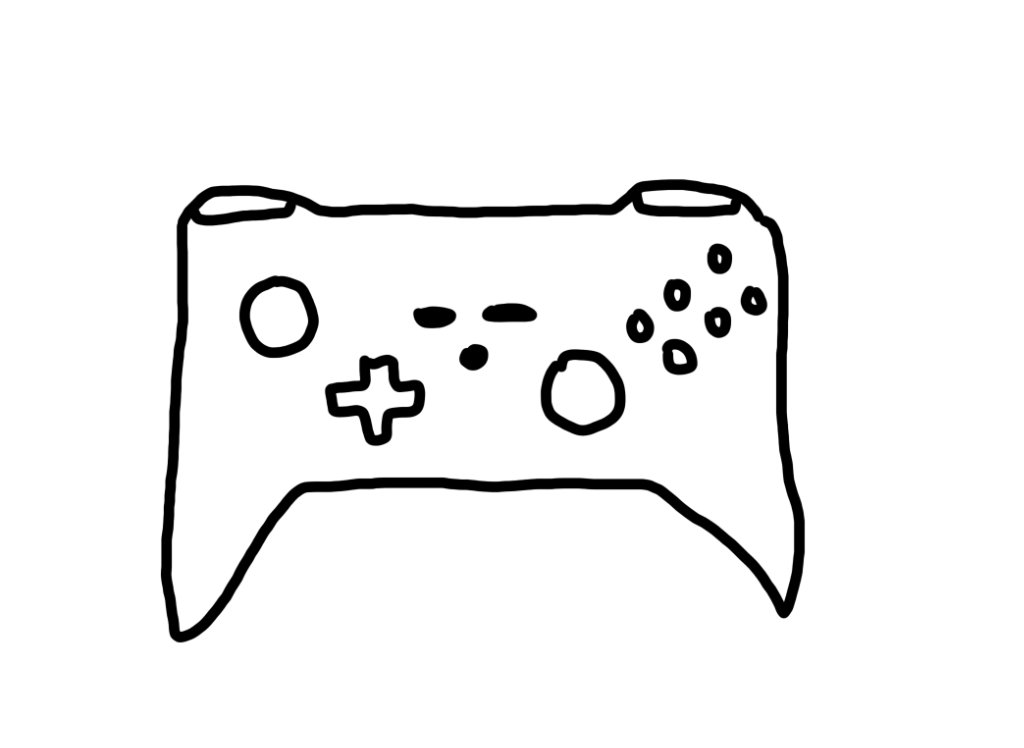
Using REFERENCE_0 as the rough concept sketch, transform it into a polished professional industrial design presentation board for a premium wireless game controller. Preserve the overall controller silhouette and control layout from the sketch, but reinterpret it as a realistic matte black product with sculpted ergonomic grips, rounded shoulders, refined seams, tactile buttons, analog sticks, D-pad, shoulder triggers, subtle metallic rings, and premium material finishes. Canvas and layout: Create a clean 4:3 product concept board on a warm off-white studio background. Use exactly 5 rendered views: 1 large hero render on the left occupying most of the page, and 4 smaller stacked panels on the right showing: front view, side profile, rear/top view, and a close-up detail crop of the controls. Use thin white gutters between panels and soft studio shadows. Branding and text: Add a minimalist title block below the large hero render with the product name {argument name="product name" default="AERO PAD"} in spaced uppercase lettering, a thin horizontal divider line above it, and the description {argument name="tagline" default="Wireless gaming controller with sculpted ergonomics, tactile precision, and refined premium materials."} Style: High-end industrial design visualization, photorealistic 3D render, soft diffused lighting, matte graphite and black materials, subtle texture, clean Apple-like product presentation, no sketch lines remaining. Constraints: Do not add hands, people, packaging, logos, or extra accessories. Keep the design clearly derived from the reference sketch while making it look production-ready.
Using REFERENCE_0 as the rough concept sketch, transform it into a polished professional industrial design presentation board for a premium wireless game controller. Preserve the overall controller silhouette and control layout from the sketch, but reinterpret it as a realistic matte black product with sculpted ergonomic grips, rounded shoulders, refined seams, tactile buttons, analog sticks, D-pad, shoulder triggers, subtle metallic rings, and premium material finishes. Canvas and layout: Create a clean 4:3 product concept board on a warm off-white studio background. Use exactly 5 rendered views: 1 large hero render on the left occupying most of the page, and 4 smaller stacked panels on the right showing: front view, side profile, rear/top view, and a close-up detail crop of the controls. Use thin white gutters between panels and soft studio shadows. Branding and text: Add a minimalist title block below the large hero render with the product name {argument name="product name" default="AERO PAD"} in spaced uppercase lettering, a thin horizontal divider line above it, and the description {argument name="tagline" default="Wireless gaming controller with sculpted ergonomics, tactile precision, and refined premium materials."} Style: High-end industrial design visualization, photorealistic 3D render, soft diffused lighting, matte graphite and black materials, subtle texture, clean Apple-like product presentation, no sketch lines remaining. Constraints: Do not add hands, people, packaging, logos, or extra accessories. Keep the design clearly derived from the reference sketch while making it look production-ready.
Sketch to Controller Design Board needs input media to work. Open it in the studio and these load alongside the prompt — pick whichever ones your chosen model can take.
Edit the prompt in the box under the preview — the template's model and format are already selected — and press Generate. Your version appears right on this page.
Yes. You can change the subject, setting, lighting, mood, format, and available model controls before creating your image.
Opening and editing this template is free. Generating uses credits, shown on the Generate button when you are signed in.
Start with GPT Image 2, which is the model associated with this template. You can compare another compatible model for a different finish.
Follow a topic to a crawlable collection of related PicX Studio templates.